


KEY TAKEAWAYS
-
As a natural lifter, progressive overload and heavy lifting will help build your back
-
Weighted Chin Ups or Pull Ups is really all you need to gain a thicker, stronger, and attractive back
Introduction
I know this may be hard to believe, but you don't need a stack of back exercises in order to build a thick, strong, and muscular set of wings!
Unfortunately, the fitness industry is filled with a ton of garbage that preaches the wrong things to people who bend their backs (no pun intended) spending a ton of their valuable time researching, testing, and reading on how they can build a sexy body!
Here at FRLS MND, our mission is to help elevate your confidence so you can enrich your life, using your fear as fuel to the fire to go after your dreams, and most importantly, using your intelligence to solve your problems in health and fitness, life, relationships, and other obstacles you may encounter.
Building an incredible back is definitely going to take time and hard work. However, change your mindset to believing anything worth working hard for will equal to bigger REWARDS (and muscles).
That's how life works: the harder the work, the bigger the rewards. Now, let's get this bread and spread those wings!
Structure of the Back Muscles
Your set of wings are comprised of many parts. That's why it's critical to develop your back muscles. Increasing the strength and mass of your back will lay a foundation in your fitness journey. Correspondingly, you will gain more grabbing and pushing power, which proves to be advantageous for boxers, UFC fighters, and wrestlers. Of course, it will definitely help in any sport you play.
Back Muscles
1. Trapezius (traps)
2. Rhomboids
3. Teres major and minor
4. Infraspinatus
5. Lattissimus dorsi (lats)
6. Erector spinae (iliocostalis, longissimus, and spinalis muscles)
Check out a closer look at the upper back muscles:
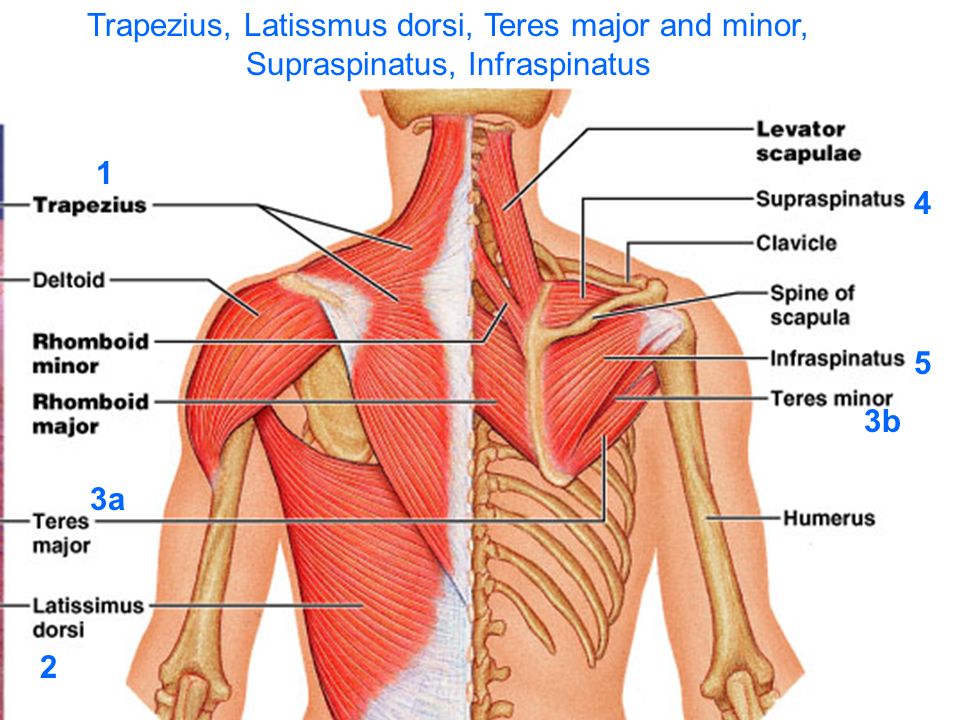
The upper back muscles (thoracic spine) are trapezius (traps), teres major and minor, rhomboids, infraspinatus, and latissimus dorsi (lats).
Thoracic Erector Spinae
Thoracic erector spinae consists of three muscles that travel through your thoracic spine in your back, and it helps different muscles in back extension.
Trapzeius
Also known as the "traps," these muscles are found from your neck to both shoulders. They have the responsibility to attach the neck, shoulder, and back areas. They help in shoulder elevation.
Teres Minor
Teres Minor are found below the armpit and posterior to the shoulder blade. They help with shoulder flexion and external rotation.
Rhomboids
Found between the thoracic spine and shoulders. In addition, they function in shoulder adduction, which contracts while the back is moving during the shoulder pull.
Infraspinatus
Infraspinatus can be found on the shoulder blade. The infraspinatus is a portion of the rotator cuff which helps in shoulder extension.
Latissmus Dorsi
The largest muscles of the upper back, also known as the "lats," are found below the armpit and shoulder blade that travel up to the mid back. Lats function as the main mover for adduction, extension, and internal rotation of the shoulder.
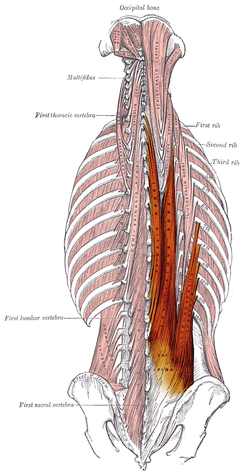
The lower back (lumbar spine) is primarily the erector spinae as shown below:

Everyone has different fitness goals, but one definite commonality we all have is for our backs to be powerful, lean, and understand the areas of no fly zones because we are trying to grow our wings, baby!
-
You want lats that makes your front body look nice and wide, the exact shape of a V, the most compelling and attractive to women.
-
Your rhomboids are strong and thick, you notice your shirts and jackets are tighter because of it.
-
Moderately muscular traps that convey dominance and confidence.
-
Chiseled and easily noticeable teres muscles and infrapsinatus.
-
We will aim to develop and grow our erector spinae that aids in many daily living activities. This is important as it forms the foundation of your back, and will distribute its power in many other exercises to build a strong, chiseled physique.
When it comes to a wide, thick back that focuses on the right muscles, you need to get strong on your pulling movements. Many people make mistakes when it comes to their back when it should be very simple:
1. Little focus on heavy lifting
-
This is a trend around the fitness industry to focus on drop sets, supersets, giant sets, and zero on heavy lifting, that increases the weights at least every week.
You will find yourself in a continuous cycle of stagnation and your back will be idle. If your back muscles lag behind, it will lead your physique to not reach it's full potential. In addition, you will not be improving. You will find yourself farther away from your fitness goals.
2. Focusing on too many back exercises or the wrong ones
Once I share the details of the most simple, effective back strategy to really fill your back out, and make training effortlessly, you will be able to add different machine and isolation exercises. However, people religiously use the wrong back exercises, and the amount of machine and isolation exercises that are used are ridiculous. NOT enough on compound lifts.
If you find yourself in this frustrating position, I understand. I've been through it. A ton of high volume, using the same reps over and over again, and no gains are being made.
Again, the fitness models and celebrities that are showing off their veins, big muscles, and 6 sets of back workouts are NOT going to work for you. We live in an era that sell dreams. Getting that dream body, car, house, and girl without putting in any work.
One of the biggest lessons you will learn is to NOT follow the advice of these fitness gurus who are lame and have nothing better to do in their life. It sucks that people truly lack integrity, and are willing to put people in harms way to earn a check. It's sad.
It's important to find trustworthy sources to share what's real and fake.
The bottom line, if you want to focus on immense growth and development as a natural lifter, you want to concentrate on heavy compound exercises.
For your back workouts, your primary focus will be pull and heavy barbell exercises. Correspondingly, your secondary exercises will be concentrated on machines.
You will find yourself easily insecure when you see the fake likes, comments, and drug induced muscles. Have no fear! You can and WILL build an incredible strong back with the knowledge that I will share with you. All it takes is healthy, consistent habits, hard work, and dedication!
Progressive Overload

We will be dialing in on progressive overload. When we focus on this type of strategy, getting stronger and bigger in the gym will lead to magical results. Of course, the key word is progressive. In other words, patience is important on your fitness journey. Just like get-rich quick schemes, people want to achieve the results of a 10 year body builder in 6 months or less. This is impossible.
Following this rule as a natural lifter, I can assure a more promising fitness journey:
If you keep getting stronger, you will grow.
That's really all it comes down to. Don't make it more complicated than it needs to be. Focus on progressive overload, meaning getting stronger on the right exercises, challenging your muscles to its maximum effort, and the rest is gravy. You will attain your desired results.
According to a study on the role of progressive overload,
"All athletes want to make the most gains from their training as possible. To do this, the principle of progressive overload must be used. Progressive overload involves systematically applying a training stimulus that forces the body to adapt and grow. When we neglect proper progression during training, certain unwanted consequences may result. These consequences include overtraining symptoms along with decreased performance. The progressive overload principle is a way to safely make training gains. So, be aware of your training stimulus and how your body is recovering from training. Major performance gains take time and dedication, but are possible if you consistently progress your workouts."
Moreover, progressive overload's goal is to add weight or an additional rep when you are doing the same exercise. This has been proven to be the most effective system.
Next, after setting a weight that stimulates your muscles, you maintain that weight until you achieve a certain number of reps. After, you increase the weight and repeat the process. We will go over this more in detail later in the article.
Stop focusing on the destination. Enjoy the present moment by being fascinated during the journey. How you're getting there, the mistakes that are being made, achievements being accomplished, and the progress you're making. When you're too focused on the end-result, you're robbing yourself of the growth and better version of yourself you are trying to create.
Be confident in yourself and who you are today. A healthier and stronger body will be a great accomplishment, and you will definitely be happier. However, loving yourself and embracing your flaws today is the truest way to start this journey. Don't worry about this guy or that guy. Fuck them. Be content with who you are, and know that by not giving up, you will achieve great things.
Heavy Lifting
Progressive overload and heavy lifting go hand in hand with another. As you progress, you will achieve a status of impressive lifts on your back exercises. In addition, the volume will be relatively low, but your muscles will be shocked adequately to the point they will need sufficient muscle and neural recovery. Heavy lifting is a 4-8 rep range. Anything more than that will be classified as higher volume, and progressing to heavier weight will be a lot more difficult.
I will provide the most advantageous way to build your back. Keep in mind, many exercises will fulfill their duty in consuming progressive overload completely. In other words, there are exercises that work really well by lifting heavy weight and implementing progressive overload, on the other hand, there are exercises that are better as isolation and milking out a decent amount of volume in order to reap the benefits. Heavy lifting and progressive overload should not be used during your entire workout. More on that later.
In with the NEW, Out with the OLD
It's essential for you to adopt a new training method if you want to build an eye catching physique. If you're new to training, fantastic. This won't affect you at all. However, if you have been training for 1+ year(s), then you will need to adapt to this training protocol.
Not just for your back, but for all muscle groups, it's imperative to focus on the right amount intensity, reps, and volume.
Creating a well-balanced workout regimen is more important than the different exercises you're doing.
Low volume = less muscle
High Volume = more susceptible to overtraining, less rest.
Again, this isn't very complicated. I will share a very effective training system that will ensure you get the most gains for your buck. You will get a great amount of volume in, and gain superior strength and size on your back in the most simple way possible.
The Best Back Exercises
Great. You know have a foundational knowledge of the back, and how you're going to achieve an elite, thick, and strong back.
Now, here comes the fun part: our full list of the best back exercises.
1. Weighted Chin Ups or Weighted Pulls Ups
The #1 exercise to build an amazing, powerful back are not dead lifts, it's getting stronger on your weighted chin ups and pull ups. If you intend to consistently add weight to your exercises as a natural, getting stronger on these variations will benefit you the most out of ALL back exercises that are out there.
In fact, chin/pull ups are one of the most challenging back exercises ever, and I'm sure less would argue of being the most difficult exercise period. You have superstars who can do chin/pull ups with ease, and others who struggle to do one. You want to be a superstar in the gym, and you will by adding this exercise to your routine.
Be mindful, people will be very impressed when you reach an elite status (adding 50lbs-100lbs) to your weighted chin/pull ups. People will stare in envy, but will think twice to mess with you.
Grips
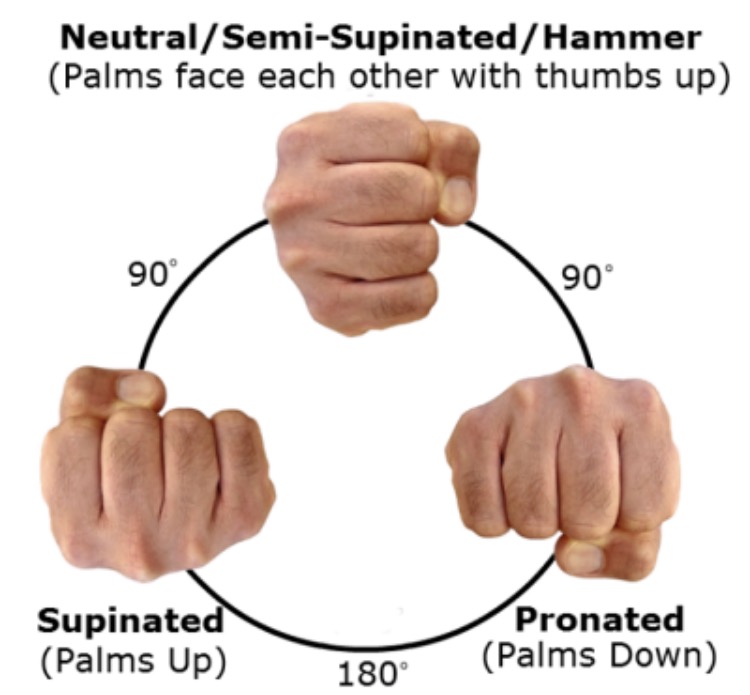
The different grip variations of this exercise are plenty, so reaching a plateau on this exercise is no problem. Chin ups use a supinated grip, meaning your palms are facing towards you. For pulls ups, your grip is pronated, your palms are not facing you but towards the opposite direction. Then, we have a neutral grip; your palms are facing each other. Each variation will build your back, no doubt. However, with each exercise, different muscles are more targeted than others.
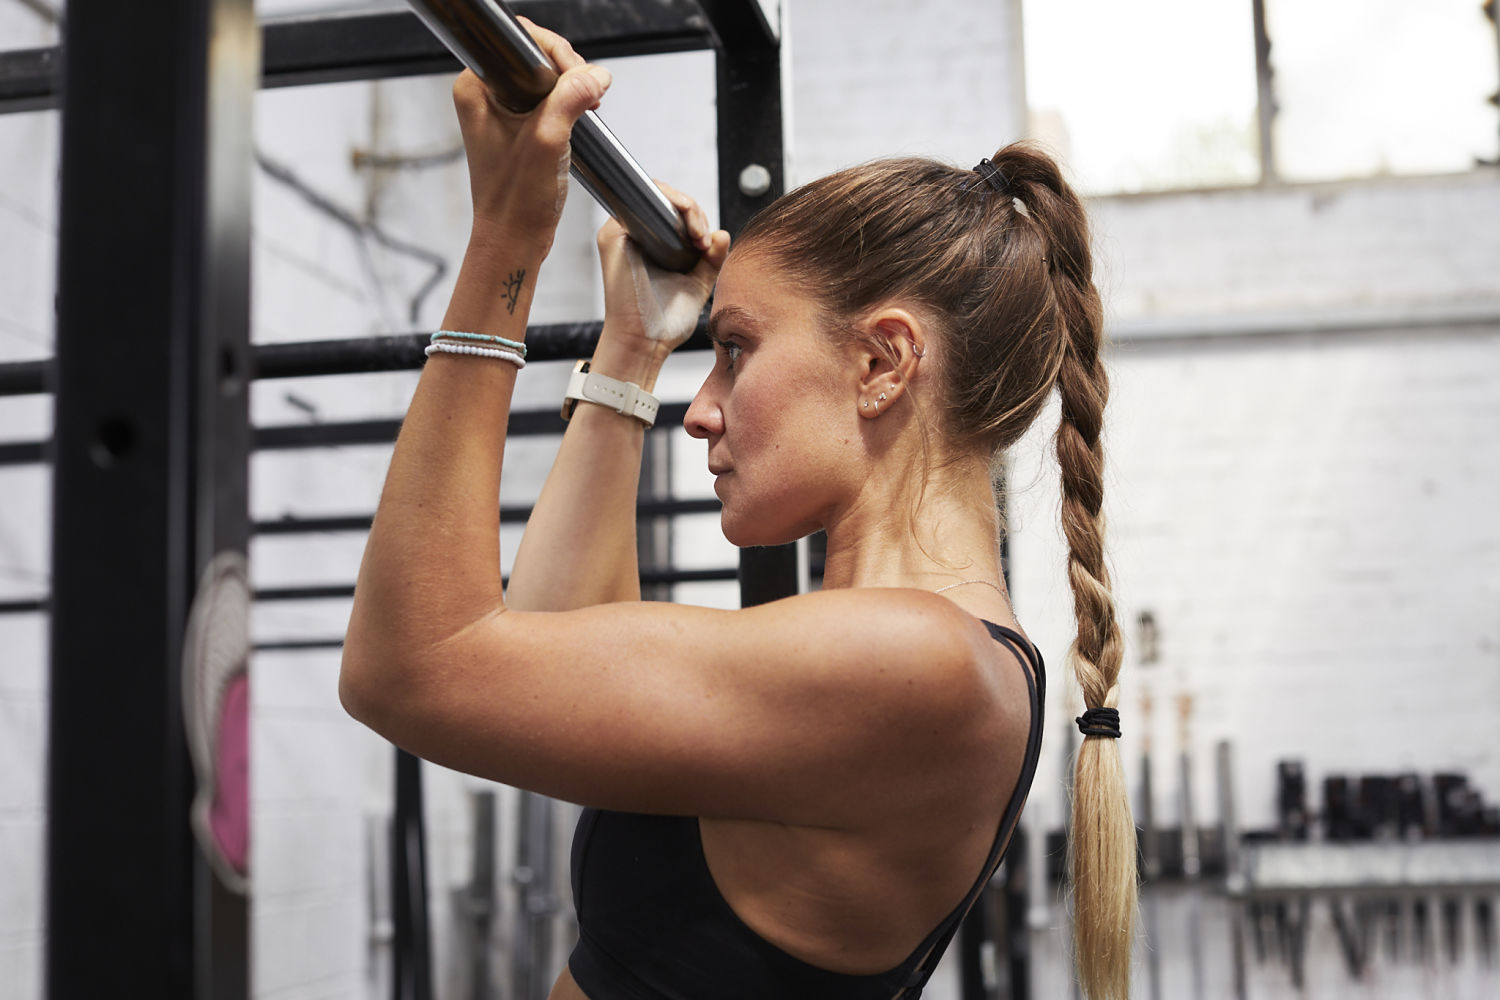
Chin Ups, Supinated Grip.
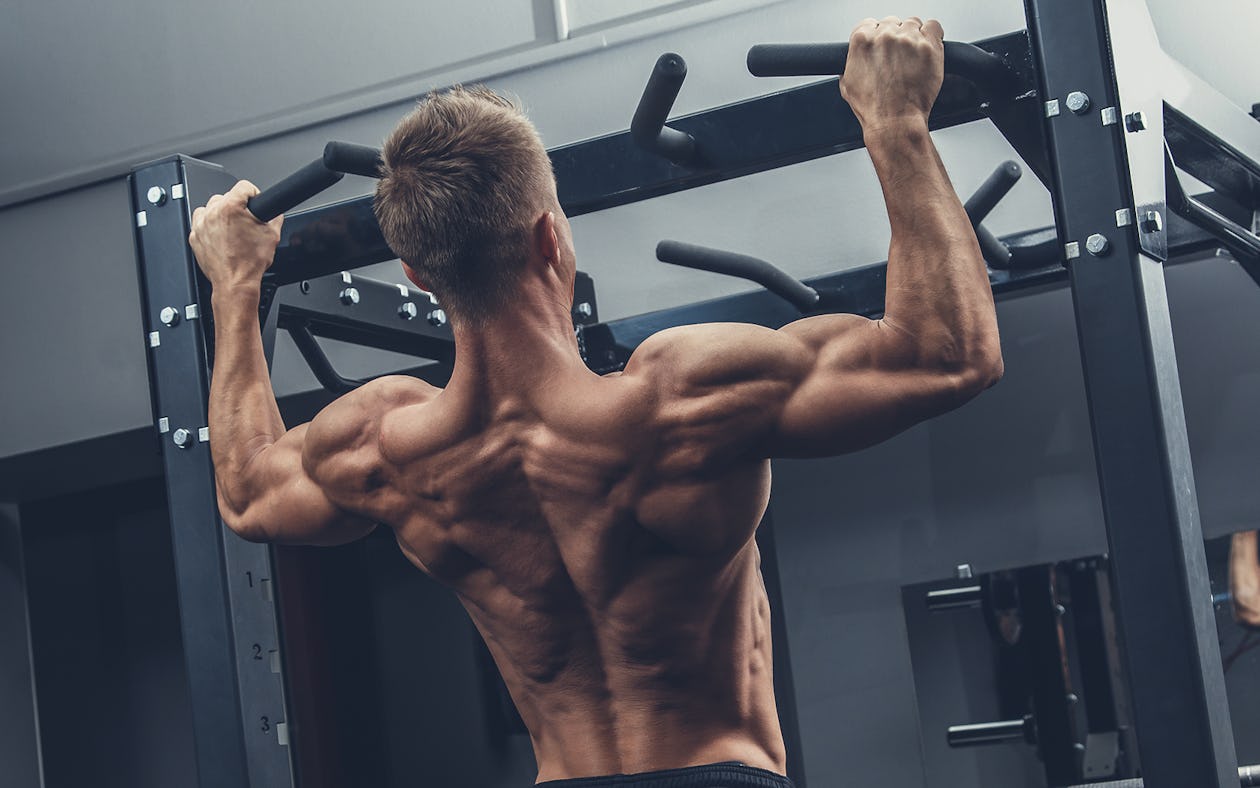
Pull Up, Pronated Grip.

Neutral Grip Chin Ups.
What Muscles Are Targeted?
To reduce any confusion, here's a simple way to understand if you want to use the chin/pull ups. Chin ups focus more on your biceps than your back, and pull ups focus more on your back than your biceps. However, you definitely want to rotate between both to promote more versatility in your physique and strengths. Your body is capable of doing many amazing things, and to limit it is not only cheating yourself, but the beauty of life. Always set the bar high, and break the meter! Let's dive deeper into the muscles involved.
Chin Ups
The muscles that are targeted during chin ups are latissimus dorsi (lats), teres major, posterior deltoid and the deep spinal stabilizers, including the transverse abdominis, lumbar multifidus and thoracolumbar fascia. In addition, the biceps brachii, brachialis (forearms), and brachioradialis are the primary muscles involved as well.
A study was conducted to compare electromyographic (EMG) responses for the greatest muscle activation for the latissmus dorsi amongst 19 males that completed 5 reps for various exercises. The results showed greatest activiation of the latissmus dorsi, the main muscles that provides that V-shape that turns boys into men, with the pull-ups and chin ups.
Chin Ups and Pulls Ups are literally defying gravity. How cool is that? What other back exercises have the ability to push through resistance with your own weight, and better yet, adding more plates to take your physique to the next level.
Pull Ups
Pulls Ups are implemented by almost everyone. It's a very popular exercise that demonstrates superhero like strength. Also, it's an exercise that resists against gravity. Pull ups target the lats, rhomboids, trapezius, thoracic erector spinae, infraspinatus, teres minor, external obliques, posterior deltoids (back shoulders), and biceps brachii.
How Wide Should I Go?
Based on this study that compared the EMG of various hand positions in Pull Ups, 10 men performed 1 repetition of 6 different grip pull-ups. The results displayed muscles activation in Biceps Brachii, all the exercises reveal significant differences with the Supine Narrow Grip pull-ups (SNG). Similarly, Prone Narrow Grip pull-ups showed a significant difference in Latissimus Dorsi with Prone wide Grip pull-ups and Prone Extreme wide Grip pull-ups, suggesting that other pull ups exercises may be similarly effective in activating Latissimus Dorsi.
In other words, a pronated wide grip pull up is the best and most effective exercise to grow and develop your upper back muscles, specifically, the lats. If you want big lats, get strong on your chin/pull ups. Moreover, when you are implementing the pull up, it's best to keep your hands facing in the opposite direction (pronated), and just outside of shoulder width to get the best contraction to your lats. The wider you go, the more it focuses on the upper back, however, the closer your grip, more focus is placed on your biceps.
Benefits
The benefits of the chin/pull ups go hand in hand. As a notice, I'm separating these exercises because everyone's goals are different. Personally, I like training more with weighted chin ups because I want to maximize the size of my biceps as much as possible. I rotate from chin ups to pull ups whenever I reach a plateau, but pull are the best for back development. After 2 weeks of training with weighted pull ups, I gained an incredible amount of strength, size, and definition. Also, it became more difficult to fit in my normal size shirts.
Besides emphasizing the size of your arms, posterior delts, and back, training with weighted chin/pull ups has a wide array of benefits:
- Stronger grip strength
- Powerful handshake (great for interviews, greeting people, and first impressions)
- If you're lean and at a low body fat percentage, your veins will be more easily visible without doing tons of biceps exercises
- Everyone at the gym is impressed by your strength. You WILL get compliments
- Quicker way to achieve the V Shape
- Improves posture
- Improves mental endurance as this is not an easy exercise
- Professional Fighters such as wrestlers have stronger gripping and bear hugging power
What If I Can't Do Chin Ups or Pull Ups? How Can I Practice for Pull-Ups?
This is an extremely difficult exercise. There are many fit people who can't achieve 1 rep of doing chin ups or pull ups. Don't get discourage. I will be teaching you different ways on how to get your back stronger so you can move onto doing 8, 10, or 20 reps of chin ups or pull ups.
If you're unable to complete one rep of chin ups or pull ups, you should implement an exercise known as "negative chin ups." This is an exercise in which you hold the chin up bar, and jump up for a rep, bring your chin high enough that is passed the bar, and then lower yourself as slowly as possible.
Negative Chinup (lower as slow as possible)
6 Sets x 5-10 reps
Tutorial on Negative Chin-Up:
Once you can achieve 10 reps for all 6 sets with ease, this should definitely solve your problem, and you will find yourself pushing out reps. I have no doubt that this will assist you on your journey on achieving chin ups/pull ups, however, if you want extra added strength and quicker results, you add lat pull downs into your workout. These will help assist in achieving chin ups/pull ups. More on lat pull downs later.
Next, you can include inverted pull up. This helps develop the strength and growth you need to in order to reach the level of executing chin ups and pull ups. As the video shows, make sure your chest is higher than your hips at the top of the rep. To make it more challenging, you can extend your legs straight with your heels planted to ground.
Check out this video:
How to do Weighted Chin Ups or Pull Ups
As a natural lifter, you can build up to a crazy amount of weight. I'm talking 50lbs, 100lbs, or even 150lbs on your weighted chin ups and pull ups. It won't be easy, but you bet it'll be worth it. It may seem absurd, but with rule of progressive overload, it is possible. By following this method, and utilizing this exercise, you will have an incredible back that will assist in many other back exercises. You will look dominate, confident, and have the best back in your gym. Soon, you will pleasantly no longer fill in your normal t-shirts and jackets.
Before we add weight, first make sure you can complete 3 sets of 8 reps for chin ups. Allow 2-3 minutes of break in between those sets. A complete rep is considered starting from the bottom, and pulling up until your chin passes the bar. Remember this while completing weighted as well. If you're doing pull ups, same applies. Once you can master your body weight by competing this rep range, you are ready to start adding weight.
We will be using reverse pyramid training to stack on weight every week seamlessly.
Your warm up set will start off with 10 reps of your bodyweight, and second set will be 50% of your first set for only 3 reps.
Warm Up
bodyweight x 10 reps
25lbs x 3 reps
For set 1, we will complete 4-5 reps only. As the rule of reverse pyramid training conveys, our first set will be the heaviest weight you are able to do. After you rest for 3 minutes, drop the weight by 20lbs of the total weight. For set 2, aim to do 6 reps.
After resting for 3 minutes, you're onto your last set. Drop the weight by 15-20lbs, and aim for 8 reps.
Example:
1st set: 50lbs 5 reps
2nd set: 30lbs 6 reps
3rd set: 10lbs 8 reps
Here where progressive overload comes in. If you are unable to complete 5 reps for the 1st set, you want to try your best to increase an additional rep each time you return to the exercise. If you attempt weighted chin ups, and hit 3 reps, the next time you are doing this exercise, you need to aim for 4 reps (or even 5 if you can complete it with great form).
If you can complete 5 reps, 6 reps, and 8 reps, increase each set by 2.5lbs. If you complete the rep range for each set, add 2.5lbs for each set when you return to do the exercise. By consistently implementing this strategy, you will be able to get stronger and stronger every week. Create a vision of yourself executing weighted chin ups for 100lbs, and by implementing this strategy, it will come to fruition.
Using the above example, increasing by 2.5lbs will be as follows:
- 52.5lbs 5 reps
- 32.5lbs 6 reps
- 12.5lbs 8 reps
You will definitely need to invest in a weighted belt. It will be well worth it. Not only will this be useful for your fitness journey, but you can also use it for other exercises like weighted dips.
Weighted Belt
Here is a $30 I suggest using weighted dip.
If you have extra cash to spare, and looking to invest in a higher quality belt that can also hold your cell phone, check this out.
In closing, weighted chin ups and pull ups are excellent to building a prestige, chiseled, and powerful back. You will 10x your physique and strength by this effective and simple strategy. I will be sharing more back exercises that you can use, however, weighted chin ups or pull ups should always be in your routine. I highly suggest this as your primary exercise, and include any of the following exercises below as secondary.
You don't need a montage of back exercises to build strength and size. As we mentioned above, all you need is heavy lifting and progressive overload.
2. Deadlift 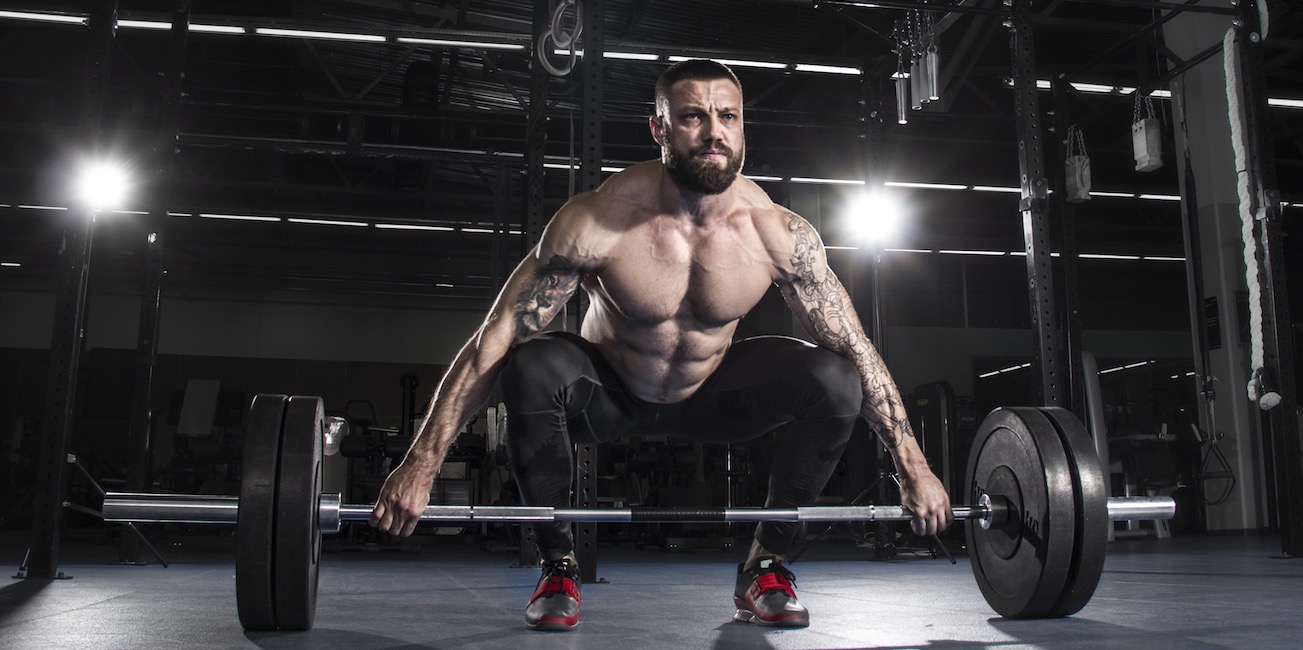
If chin/pull ups are the first best back exercise, there is no doubt that the deadlift is second. Many people may argue about which exercises are the best, but this is what I found the most effective and simple way to build a powerful, well-defined back. Deadlifts are definitely #2 on my list, and should be included in your routine for building the best back that you can build.
The deadlift is a powerful exercise because it is one of the most profound, well-rounded compound lift for your entire body. It targets and challenges a ton of muscles simultaneously, and there are variations that challenges muscles more than others.
When a person incorporates the Deadlift, they will develop their:
- Core
- Grip and forearm strength
- Hamstrings
- Quadriceps
- Gluteaus Maximus (buttocks)
- Lower Back
Furthermore, based on research in EMG activity for deadlift exercises, it was concluded that the muscles that were most activated during the Deadlift are the erector spinae and quadriceps muscles, and the gluteus maximus, biceps femoris, and hamstrings were less activated. On the contrary, the Romanian Deadlift showed decreased activation for erector spinae than the biceps femoris.
For individuals who suffer from past or current back injuries, please consult your primary care provider to ensure the best possibilities of performing the deadlift. It's never safe or the best interest in your health to utilize exercises such as the deadlift that will be detrimental to your health and well-being.
The reason being, many people who have performed the deadlift have found themselves injuring their back. Without proper form and education, the deadlift can be harmful for your lower back.
When executed properly, the deadlift is the best exercise for growing and strengthening your lower back and preventing injury. There are different variations of the deadlift that will be included for those who want to place less focus on their lower back due to past or current injuries.
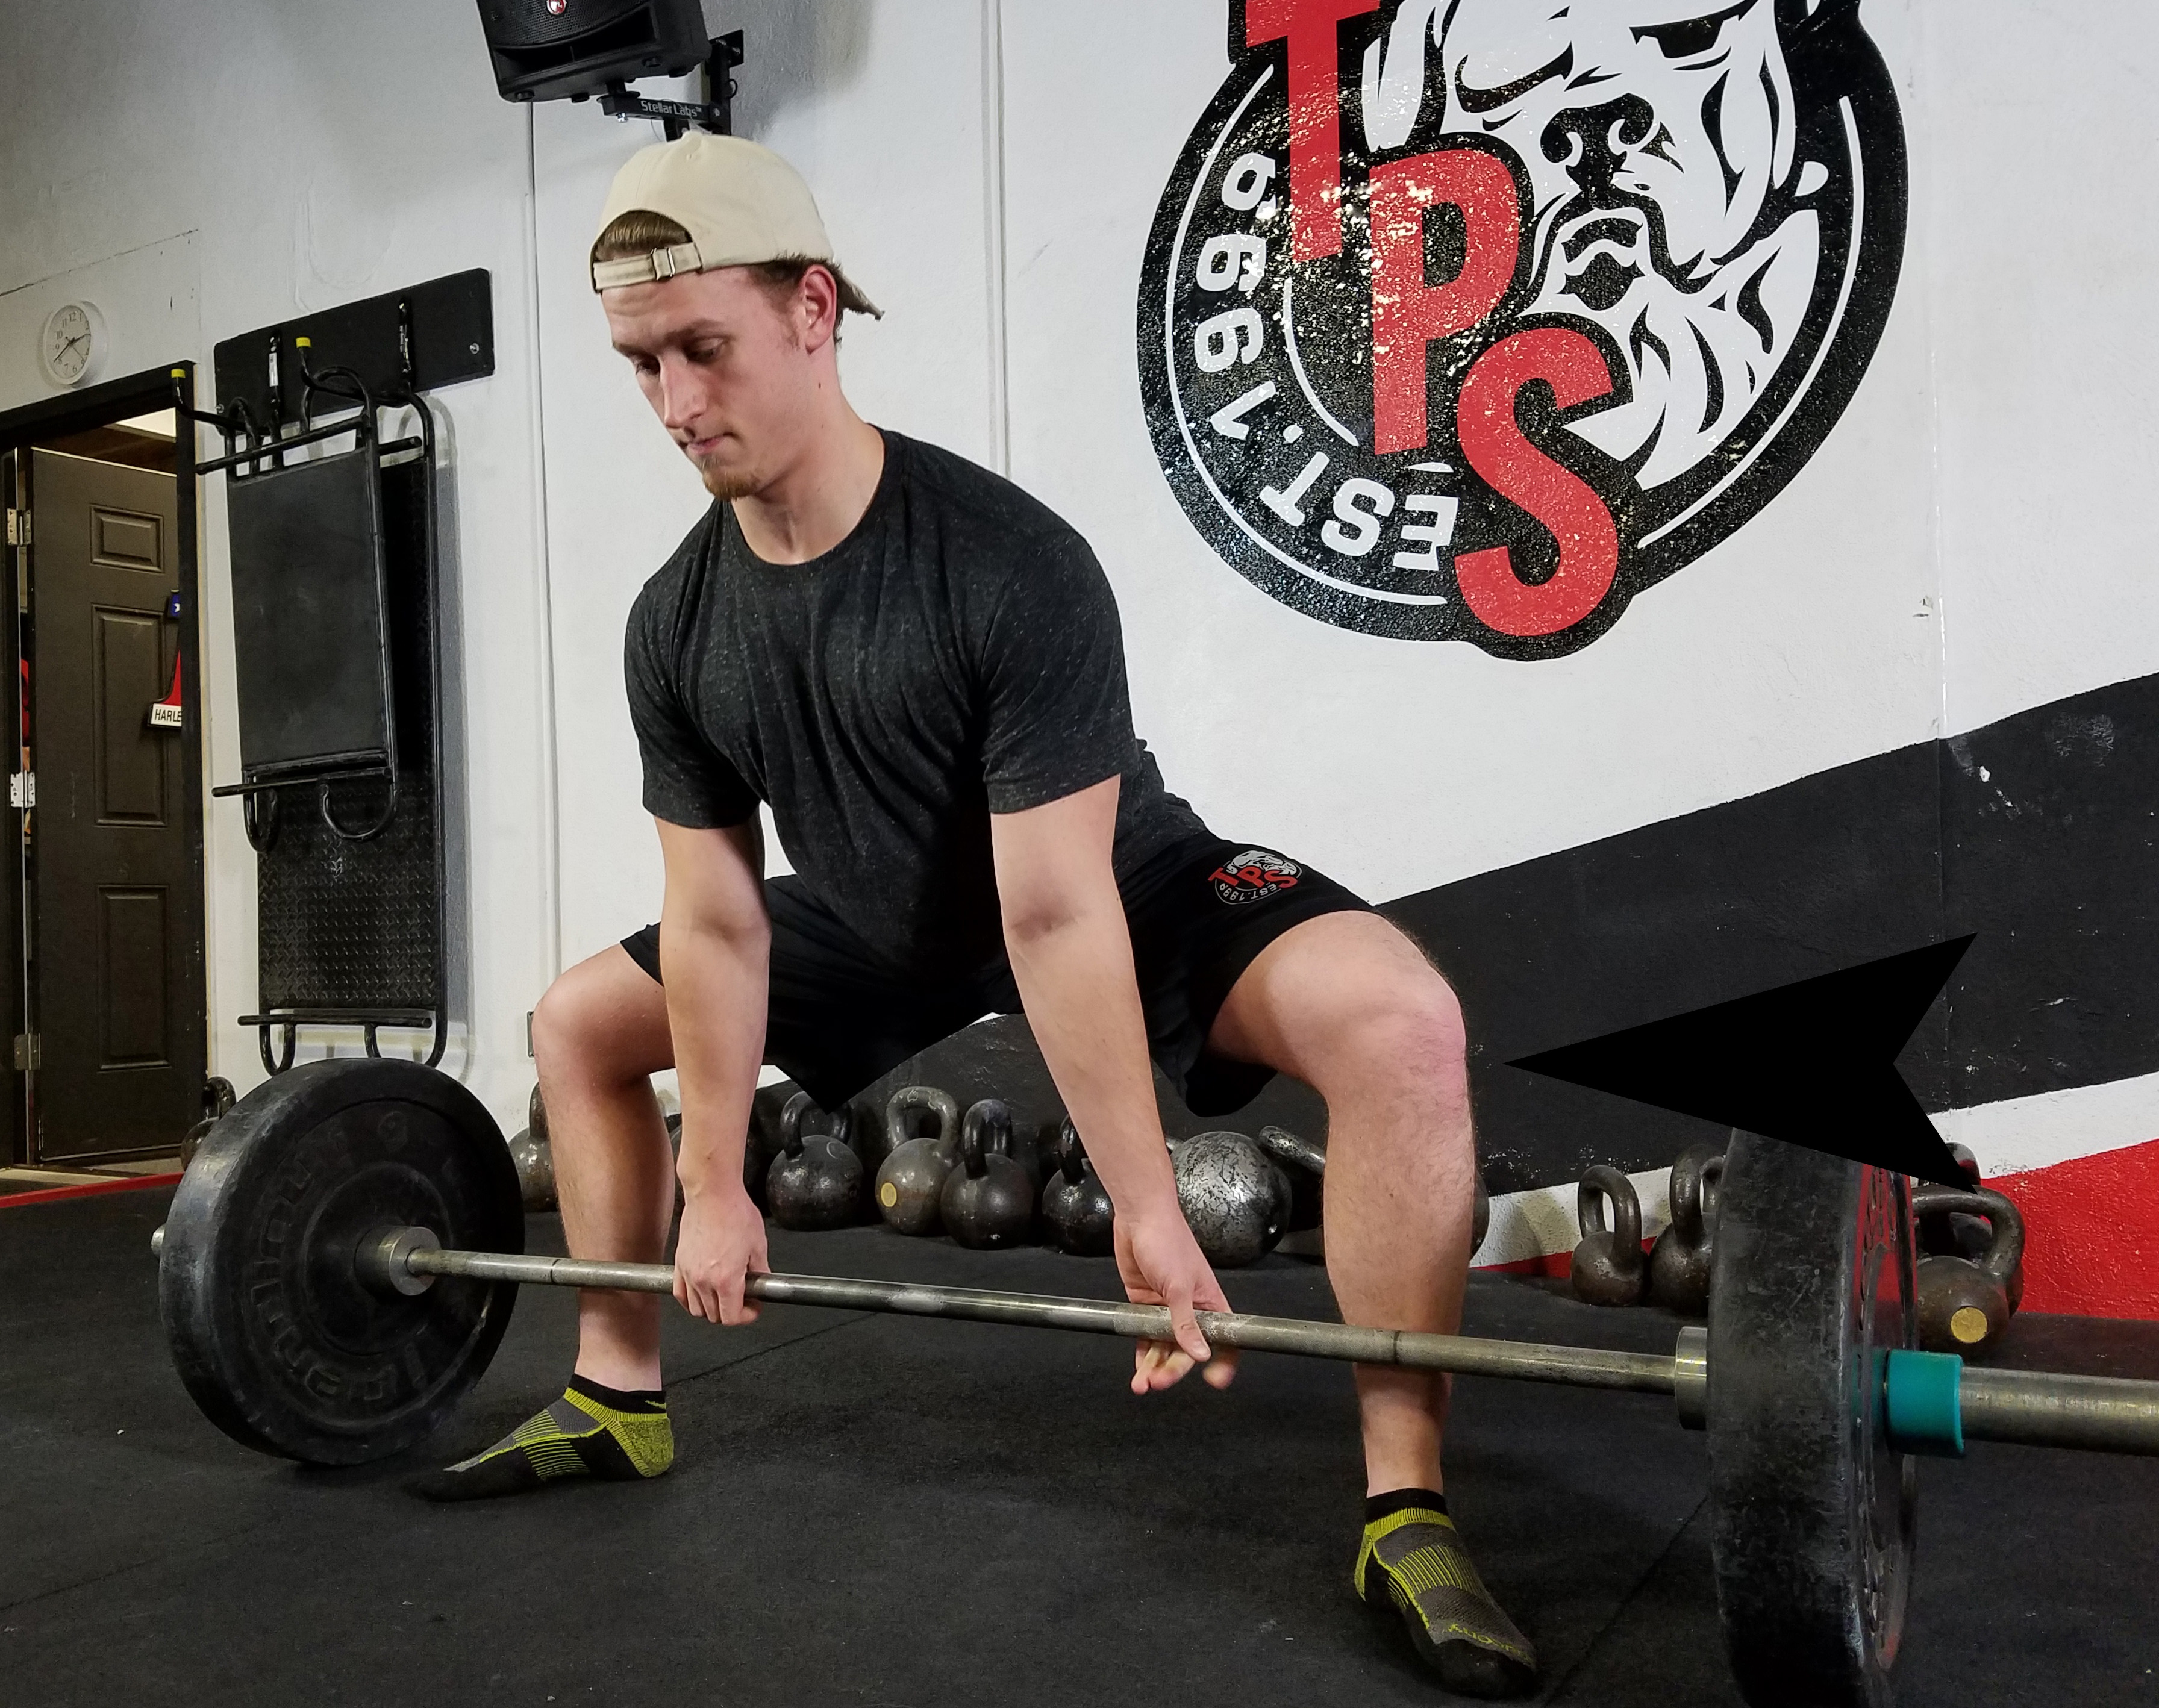
How to Deadlift
If you’re a beginner, I recommend using a bar or very light weight to practice the form and movement of the deadlift. By doing this, you’re ensuring your muscle memory to attain all the information that goes into this exercise. So, when you’re ready to lift heavier weight, it will be natural and simple as possible.
Accomplishing proper form of the deadlift is not a complicated task. It’s fairly simple, and just requires patience and practice.
Step 1.
Either using just the bar or adding light weight, place your feet less than shoulder-width apart.
While standing, place your feet under the bar midfoot. This is the portion of the foot that sits between the hindfoot and forefoot. One simple way to convey this is act as if the barbell is equally dividing your feet.
You can keep your feet facing forward or you can slightly turn them in the opposite direction. Find what you’re most comfortable with, but definitely don’t turn your feet completely.
Step 2.
Bow over and grip the bar with your hands placing them at shoulder-width apart.
- While your bowing over, an important thing to note is your shoulders are parallel with the bar or marginally behind the bar. This ensures you have the highest amount of support as you lift the bar.
- MISTAKE: If your shoulders are in front of the bar, you will find yourself naturally adjusting the bar forward as you lift the weight to get it over your knees. Don’t position the bar too close to your body. When you lift off, it should be a smooth process with your knees out of the way, therefore, keep your shoulders parallel to the bar and being confident they are equally aligned with one another.
- GRIP: Double overhand or overhand-underhand grip are ideal. Doesn’t matter which one you choose. If you want to challenge your grip strength, I suggest overhand-underhand. Many people utilize this position when they are lifting heavier weight.
Step 3.
Bend your knees and ensure your shins are in contact with the bar
Here’s how it should look:
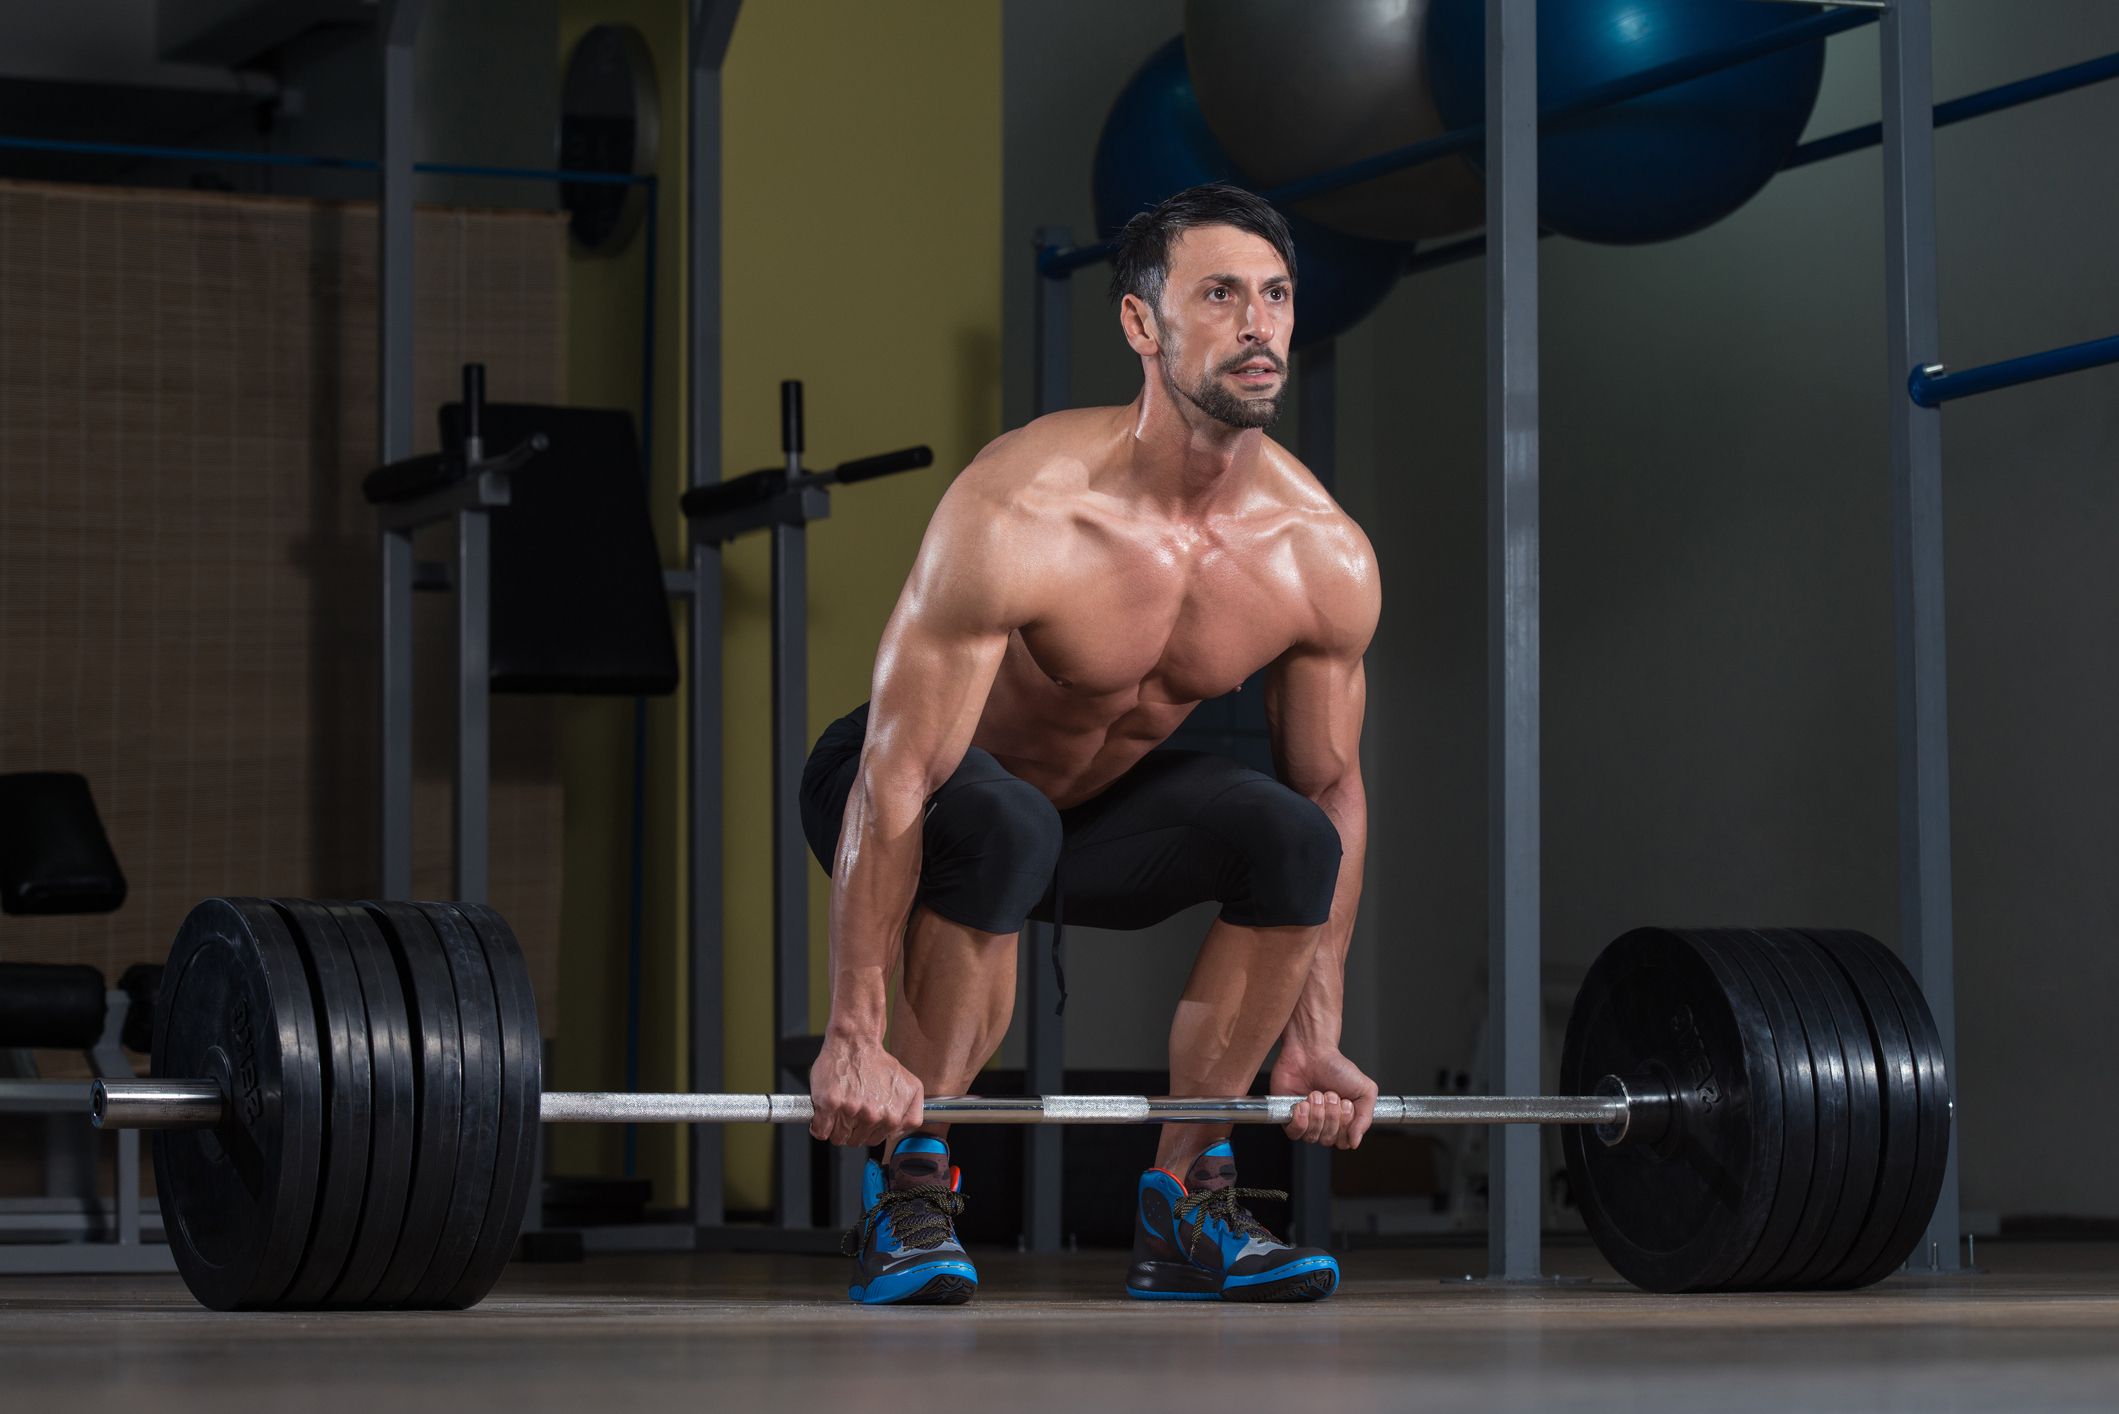
The degree of contact of the bar to your shins will vary based on your weight and size. If you’re short with a heftier build, an optimum point is having the bar hovering over the mid-foot. On the contrary, if you’re skinny with a height of 5’11 and up, you’ll most likely find your optimum point with the bar in close contact with your shins.
Step 4.
Straighten your lower back, face forward, and lift your chest up
This step is critical. Keeping your chest out and straightening your back are vital in preventing injury to your lower back. If you’re slouching, you will hurt yourself. By lifting your chest, you’re allowing your body to be at an optimal position.
During Step 4, tighten your core as if you someone was taking a jab at your liver (liver shot). Bracing your core helps secure your lower back and prepares it when you stand up tall for the deadlift.
Slightly arch your back, and make sure your hips are not too low. This is not a squat, but you should feel tension in your hamstrings, and your buttocks should be activated. They will be assisting during this exercise.
Step 5.
Take a big breath, hold it, and lift the weight by standing up
During this step, make sure your head is not looking up or down. As mentioned earlier, face forward.
Explode upward and slightly lean back as fast as you can by driving through your heels. The deadlift is a motion of getting the bar off the ground to your hips. When you’re traveling, you want to get from point A to B. That’s exactly what I want you to think when executing the deadlift.
Ground (Point A) to Hips (Point B)
Again, do not round your lower back when you’re ascending. Make sure it has a slight arch. This will help stabilize your lower back, but you will feel more tension on your hamstrings and glutes, building and strengthening both muscles.
Step 6.
Push hips into the bar by squeezing your glutes, hold the weight for a second at the top
Continue to brace your core by keeping it as tight as possible with your elbows, hips, and knees locked. Your body should remain tense and tight until the bar is back on the ground.
Step 7.
Descending the weight back to the floor
Move your hips back while bending your legs. While doing this, continue to keep your core tight, slightly arched lower back (tight and stiff), and shoulders down as the bar makes contact with the floor.
Rest a second at the bottom and repeat the steps.
When you rest a second at the bottom, it will prevent you from utilizing the momentum you will get from descending the barbell to the floor. Many people will push out reps with a floor bounce.
When you rest for a second, you lose the momentum that eliminates messier and incorrect reps. By doing this, you’re increasing the likelihood of perfect form, stronger lifting practices, and getting the most out of the deadlift.
Important Notes
Keeping your lower back neutral to avoid injury. If you round your back during the deadlift, it will cause harm and danger for your spine. When you’re performing the deadlift, you must ALWAYS execute with a neutral lower back. The slight arch and stiffness in your lower back is a key description to convey the best practices to avoid spinal injury.
Connecting the Pieces
This was a lot to take in. After reading the steps, please review this video in order to digest this information more effectively. By doing both, you will be well on your way on achieving better form
Sumo Deadlift
Personally, my favorite variation of the deadlift is the Sumo Deadlift. I find this version to be easier, puts less strain on your back, and effective in building a thick back and bigger legs, especially the quadriceps.
The main difference between the conventional deadlift and the sumo deadlift is the width of your feet placement.
For conventional deadlift, your feet are slightly less than shoulder-width, however, for the sumo deadlift, you have a wide stance that is broader than shoulder width, close to 3x more than conventional.
With this wide stance, each rep will be of shorter range of motion. Furthermore, for individuals who have/had lower back injuries, it lessens the amount of stress that is placed on the spine.
Similarities of the Conventional and Sumo Deadlift
- Spine and head are neutrally aligned
- Lats and hips are engaged and targeted
- Increased grip strength
- Increase hip strength
Most Muscle Activation
Sumo- Glutes
- Hips
- Legs
Conventional
- Lower back
- Hamstrings
Biomechanics of Sumo Deadlift
- Trunk is in a upright position and changes the position of the thighs
- Grip/hand positions tends to be narrower and toes turn outwards more greatly than the conventional deadlift
How to do Sumo Deadlift:
- Place feet wider than hip-width
- Feet are placed under the barbell with toes turn outwards (40-45 degrees)
- With hips higher than the knees, grip the bar tightly with hands marginally less than shoulder-width apart
- Face forward, push the chest out, contract shoulder blades together, and tighten the core
- Explode up through the heels while keeping the bar tight to the body
- Push hips into the bar by squeezing the glutes at the top of the rep
- Perform the opposite to descend the bar back to the floor
Take a look at the tutorial
3. Barbell Row
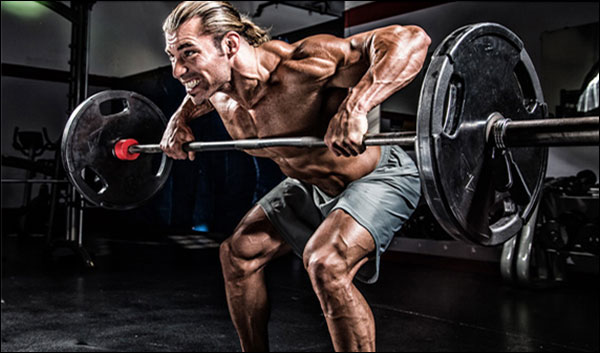
The barbell row is a phenomenal exercise to build the back. It’s simple, but does an amazing job at building the back, shoulder girdles, and elbow flexor muscles. In addition, the barbell row has a higher muscle activation in the erector spinae and can be used to develop core muscle strength.
Muscles worked during barbell row:
- Lats
- Trapezius
- Rhomboids
- Rotator Cuff muscles
Benefits of Barbell Row
- Significantly improves posture and movement
- Strengthens core muscles
- Improves your bench and overhead press
How to: Barbell Bent-Over Row
Pendlay Barbell Row
This variation of the barbell row involves rowing the bar off the ground as opposed to having the bar resting on a squat rack. The main advantage of this exercise against the traditional barbell row is greater range of motion. Furthermore, when you’re executing this exercise, it will require you to position yourself in a more parallel stance which will lead to more hamstring muscle activation.
This is considered more challenging than the traditional row and will place more stress on your lower back. For this reason, if you have/had back injuries, please consult your primary care provider for more guidance and directions on whether performing this exercise is beneficial to you.
How to: Pendlay Barbell Row
4. Seated Cable Rows or Machine Row
The cable rows are a fantastic exercise to build your upper back. To really engage your lats, I found using less of your arms to pull the cable activates your back muscles significantly. Shift the focus from your hands and forearms to your back. Silly to say, but I act as if my lats have arms and are pulling the cable instead of my actual arms. I found this to be very effective.
In addition, keep your back arched and chest out when performing this exercise.
If you want to swap out for exercise rotation, you can use machine rows as well. I find these more fun and effective to do than the traditional cable row. My back gets a great pump, and I’ve noticed more definition on my back after implementing this variation.
How To: Seated Cable Row
How To: Seated Machine Row
5. One Arm Dumbbell Row
I love the one arm dumbbell row, and I know you will too. Build these to 70s, 80s, and even 100s, and you will have an amazing back. This will be simple to achieve if you focus on progressive overload and heavy lifting.
I’ve made mistakes of training the one arm dumbbell row by placing my hand on the weight racks and using it to balance. I made sure I didn’t make this mistake after hurting my back. Thank God it healed in a few days.
Make sure you’re using a bench and placing the opposite knee of the side that is performing the exercise. For example, if you’re starting with the right side, hold the dumbbell with your right hand, and place your left knee on the bench. Vice Versa. This is the best way to execute the one arm dumbbell row.
Also, you can use an incline bench press, adjust it to a 80-90 degree angle, and stand behind it with your hand placed on the top. Next, whichever side that is performing the exercise, extend that same side leg straight back, using your toes to balance yourself out.
For example, if you’re starting with your ride side, use your left hand to grip on the top of the bench while holding the dumbbell with your right hand. Then, extend your right leg back by balancing on the ball of your feet, with your left knee bent and foot planted on the ground.
Again, I recommend on executing the exercise as shown below:
How To: Dumbbell Bent-Over Row (Single-Arm)
6. Single Arm Cable Shrugs
Building big traps is key to being perceived as a confident and dominate man. When men have big traps, it usually means they’re on steroids. However, you can build thick and aesthetic traps without being on juice or any drugs.
Incorporating cable shrugs will help you get there. By using cables, you are keeping the tension on your traps as opposed to dumbbell or barbell shrugs. This will allow for more muscle fiber recruitment and sarcoplasmic hypertrophy.
During this exercise, bring your shoulder to your ear for maximum tension and focus on your traps. After the last rep, doing an additional rep and hold that rep for 5 seconds for all sets.
How to: Single Arm Cable Shrugs
That’s it?
Yup, that’s all she wrote! I know, 6 simple back exercises when you’re use to 10 or 15 or even 20. The truth is, out of these 6, you should only be doing either weighted chin ups or pull ups and picking another exercise from this list to add to it.
I wouldn’t recommend using no more than 2 or 3 back exercise to do every week. Remember, achieving a strong, thick, and aesthetic back is really all about getting stronger on your weighted chin ups or pull ups. It’s really that simple.
Yes, you will get a wider, bigger, thicker, and powerful back by getting stronger on your weighted chin ups or pull ups. I know it’s hard to believe, but it’s even more disappointing that people are working out their back 3 or more times a week with 4-5 exercises.
Your muscle development and strength with plateau by doing this.
The main key is progressive overload. Keep getting stronger, and you will definitely get bigger. Heavy weight, more reps, and progressing on your lifts each and every week. That’s what natural lifters need to understand.
If you find yourself comparing to other big dudes on Instagram, ask yourself and wonder if they’re on steroids. They probably are. Many insta-famous physiques are not achievable without the use of drugs.
Ultimately, by hitting your calories, getting sufficient rest and recovery, and lifting heavy by a means of progressive overload, you will get bigger, stronger, and look incredible.
The Best Back Workout
After implementing this workout for 3 weeks, you will see noticeable gains on your back and biceps. If you’re training 3 days a week, I suggest incorporating this routine once-twice a week. However, if you’re training 5 or more days a week, do this once every 5 to 7 days. That will be adequate for muscular and neural recovery so you can get back in the gym stronger.
For the next 8-12 weeks, or 2-3 months, use this workout. After 8-12 weeks, switch chin ups to Pull Ups.
Weighted Chin Ups Reverse Pyramid Training (RPT)
Warm Up
8 reps of bodyweight
3 reps of 50% of your heavy set
1st – 5 reps
2nd – 6 reps (reduce 20lbs from 1st set)
3rd – 7-8 reps (reduce 20lbs from 2nd set)
For this second exercise, use either the deadlift or barbell rows. Both exercises are great, and any variations depend on your choice. After 8-12 weeks, you can switch from deadlift to barbell rows or from barbell rows to deadlift.
Conventional Deadlift or Barbell Rows (RPT)
No Warmup necessary
3 sets
1st – 5 reps
2nd – 6 reps (reduce 20lbs from 1st set)
3rd – 7-8 reps (reduce 20lbs from 2nd set)
Single Arm Cable Shrugs
4 sets
12-15 reps
Optional
Cable Rows
4 Sets 10-12 reps
Increase each set by 5lbs
Example
35lbs 12 reps
40lbs 12 reps
45lbs 12 reps
50lbs 12 reps
Details on Optional Exercises
If you’re up for another set of a back workout, include the optional exercise. However, weighted chin ups and pull ups take a lot out of you. They’re pretty taxing and adding deadlift or barbell rows after will blow your back up. If you want to include another exercise, go for it.
Keep in mind, if you’re getting tired, and don’t have enough energy, don’t do it. It’s always best to leave energy in the tank so next time the workout is being done, you’ll be hitting personal records.
Putting Progressive Overload to Work
Weighted Chin Ups or Pull Ups
Every time you hit the reps provided, you will increase the weight by 2.5lbs. As mentioned in the Weighted Chin Ups portion of the article, when you hit 5 reps, increase it by 2.5lbs. Same goes for the second and third set, 2.5lbs is added the next time when you hit 6 and 8 reps. If you are unable to hit the required rep range, keep the weight the same for all three sets.
Second Exercise (Deadlift or Barbell Rows)
For deadlift or barbell rows, it’s easier to add weight on these exercises. Instead of 2.5lbs, I would add 5lbs on each side of the bar, making it a total of 10lbs.
For example, you achieve your goal of hitting 250lbs deadlifts for 5 reps. Congrats! Next time you hit deadlifts, pack on 5lb plates on the left and right side of the barbell. When you return, your next goal is to hit 260lbs for 5 reps.
If you aim for 5 reps, and only hit 3 reps with 260lbs, work on this exact weight until you reach your goal of 5 reps for 260lbs. ONLY increase the 2nd and 3rd set by 10lbs if you successfully achieved 5 reps for the 1st set. If you’re able to do 5 reps for your heaviest set, I have no doubt you will be able to do 6 and 8 reps after dropping 20lbs each.
Also, if the weight you have for your second and third set is easy, add an additional 1-2 reps. If 240lbs is feeling easy during the 6th rep, you can go for 7 or 8. It all depends on how you feel. Use your best judgement.
Rest Period

It’s important to rest and recovery sufficiently. You’re going to be hitting heavy weight, or you’ll be hitting heavy weight soon. Resting for 3 minutes should suffice.
After all, we’re working out and trying to make gains. You don’t want to rest for 5 minutes because you still want to challenge yourself as much as possible. Moreover, you want to give your body the rest it needs when you’re lifting heavy through RPT. This way, you’ll be ready to give 100% each and every set.
If you’re not lifting heavy, just remember that when you reach that level, you’ll be thankful for those 3-minute breaks. They’re crucial! Set your timer and grab some water. Stay focused because once that alarm goes off, it’s time to chase the gains!
In Closing: Best Back Exercises
All muscles take a great deal of time, patience, and hard work to grow, gain strength, and develop.
To put it into perspective, you’re trying to grow wings! You’re trying to fly, and shoot for the stars. Seriously, packing on a set of wings (lats), and developing one of the largest muscles groups in the human body.
That doesn’t mean it has to be difficult. With these tips, you’re well on your way there. You can easily have an attractive and strong back utilizing these strategies and guidelines.
Every little progress will get your closer and closer to your goals. You will get there. I believe in you! Do you believe in yourself? Well, you should.
You deserve it. You deserve an incredible back as well. Just keep focusing on getting stronger, packing on those plates, rest up, and eat!
Up, up, and away!